

iOS Mail Setup POP3
POP3 mail account setup guide for iPhone and iPad devices
iOS Mail Setup POP3
Follow the steps below to easily set up your mail account
Note: This guide is prepared for iPhone and iPad devices. Make sure your mail account information is ready before installation.
Step 1: Open Settings Menu
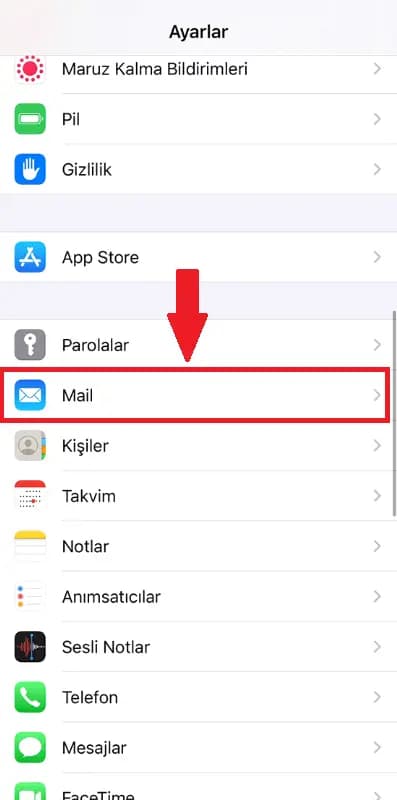
Open Settings on your iPhone, scroll down, find and tap 'Mail'.
Step 2: Go to Accounts Section
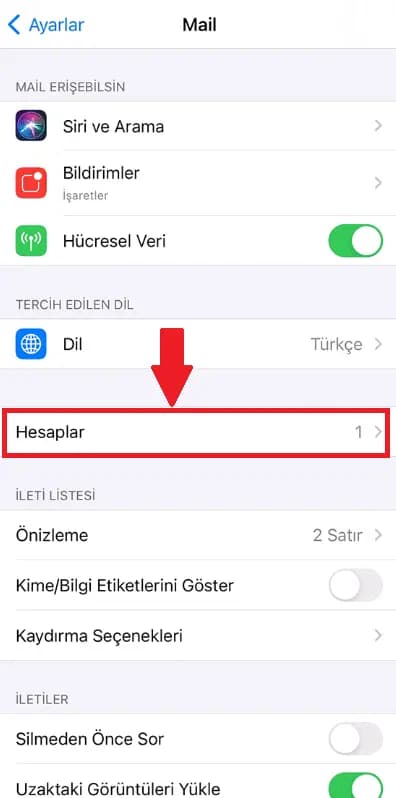
On the Mail settings page, tap 'Accounts'.
Step 3: Add Account
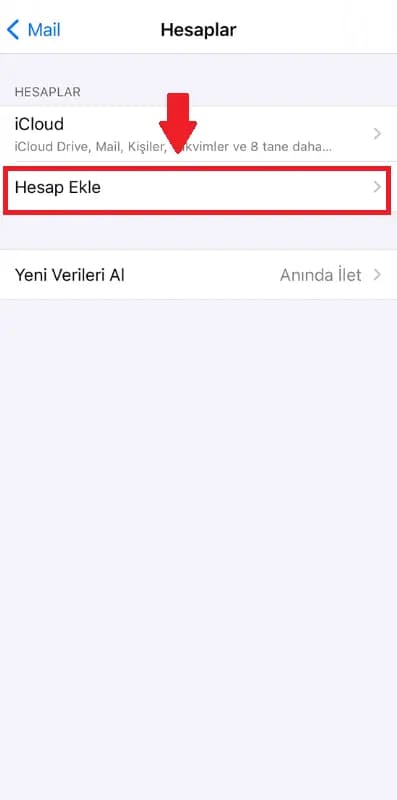
On the Accounts page, tap 'Add Account'.
Step 4: Other > Add Mail Account
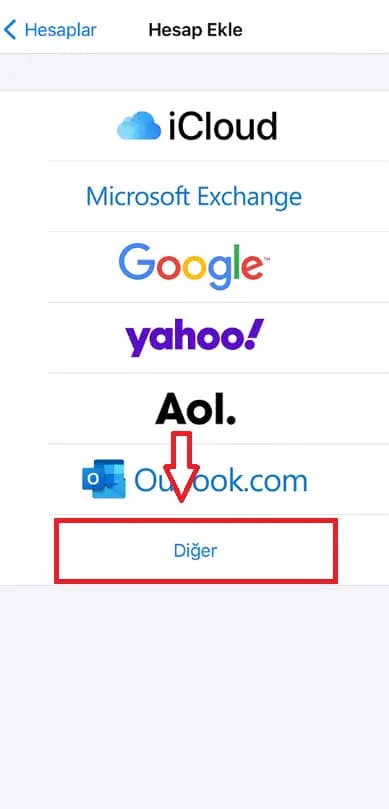
Tap 'Other' at the bottom of the email providers list, then tap 'Add Mail Account' on the next screen.
Step 5: Enter Account Information
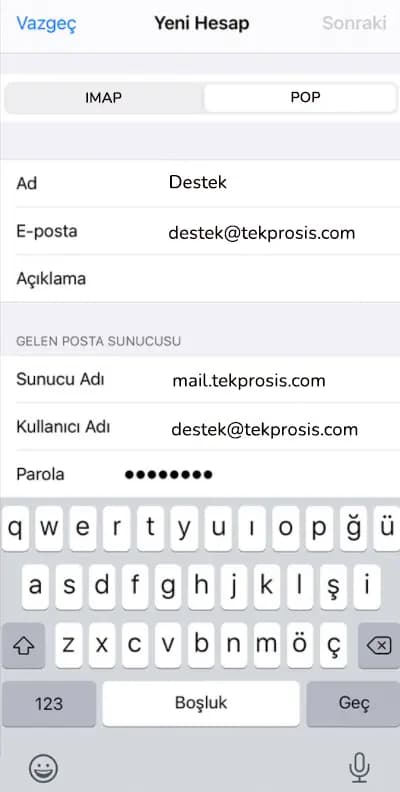
Fill in the Name, Email, Password and Description fields, then tap 'Next' in the top right corner.

Step 6: Select POP and Enter Server Details
Select 'POP' at the top. In the Incoming and Outgoing Mail Server sections, enter mail.yourdomain.com as the Host Name, your email address as the User Name, and your password, then tap 'Next'.
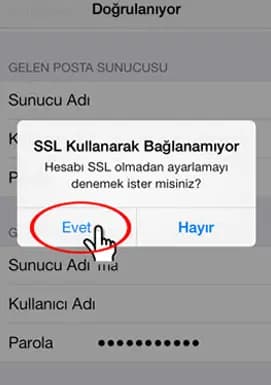
Step 7: Confirm the SSL Warning
If the 'Cannot Connect Using SSL' warning appears, tap 'Yes'. After verification completes, tap 'Save' to finish setup.
POP3 Server Settings
Incoming Mail Server (POP3)
- Server: mail.domainadi.com
- Port: 110 (SSL: 995)
- Security: SSL/TLS (Recommended)
Outgoing Mail Server (SMTP)
- Server: mail.domainadi.com
- Port: 587 (SSL: 465)
- Authentication: Required
Important: Enter your own domain name instead of "domainname.com". Enter your email address and password in the username and password fields.
📞 Do You Need Help?
If you experience problems during installation, you can get support from our expert team.